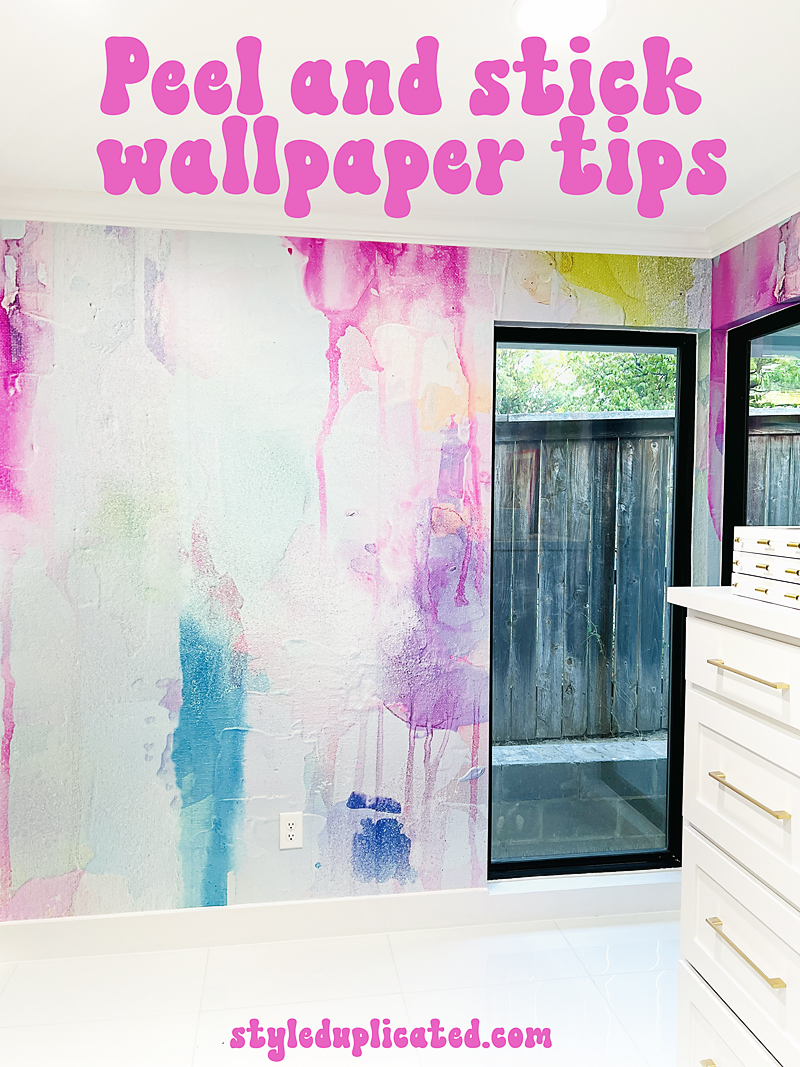
This was my second time installing peel and stick wallpaper and it looks so good!
Here are a few tips and tools that make it go smoothly, literally!
I suggest you recruit a partner, teamwork make this much easier.
Peel a little at a time as you go. We would peel about 6-8 inches, stick it down in the middle and press it outward with hands. Then go back over it with a ruler to smooth out other bubbles. Try not to be too aggressive with the ruler, this stuff snags pretty easily.
If you mess up, which you probably will, it is easy to lift it up and stick it again. Just beware of pulling on it, it can stretch out which makes the pattern difficult to match up.
We used an xacto knife to cut around the outlet after we removed the cover and also to cut the wallpaper at the baseboard. Using a straight edge like a squeegee is the best way to ensure your cuts look great.
For the window corners, wrap tightly around the edges and when you get up to the corner, make a diagonal cut with the xacto knife. Wrap those flaps and stick them down. There will be a little space left that will need to be patched so make sure you save scraps for that and any other spots that might need some patching.
If you still have some air bubbles, pop it with a needle and smooth it down.
I got this beautiful peel and stick wallpaper from Vivian Fern, they have tons of colorful murals to choose from!

Here are some helpful tools.